Ensuring the security of your Kazawallet account is of utmost importance.
Linking your account with Google Authenticator adds an extra layer of protection.
Here's a step-by-step guide to help you set it up:
1- Visit Kazawallet Website:
Open your preferred web browser and navigate to the Kazawallet website.
2- Sign In to Your Account:
Log in to your Kazawallet account using your credentials.
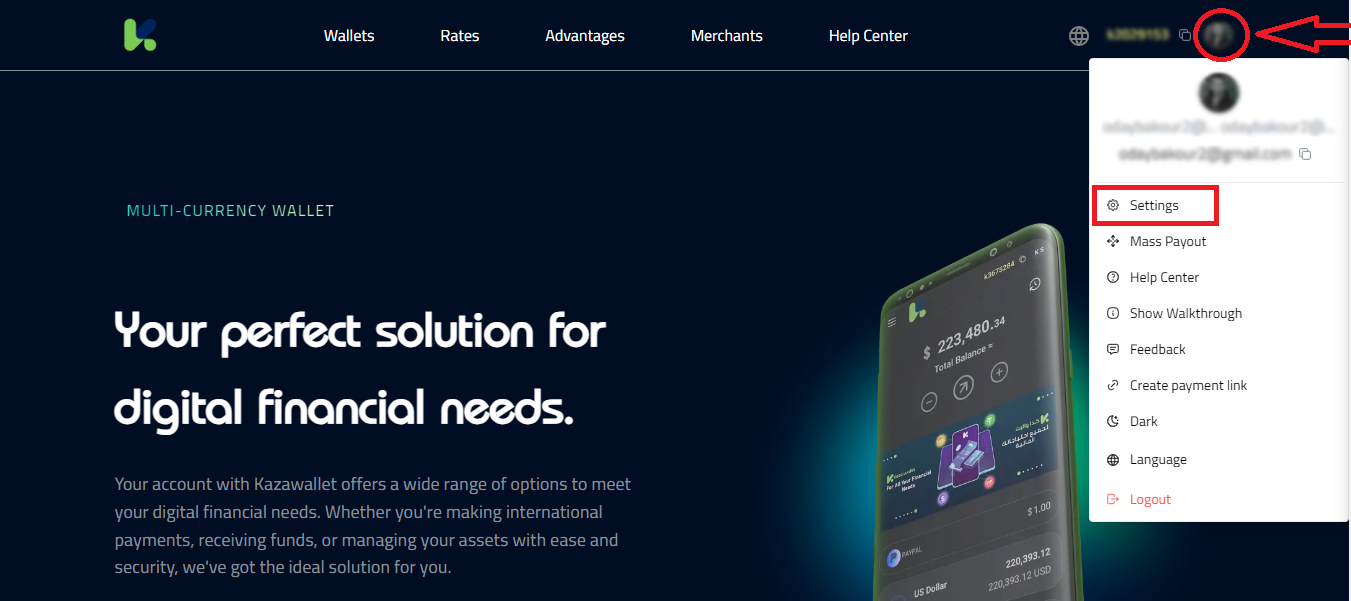
3- Access Account Settings:
Click on your avatar in the top-right corner of the homepage.
Select "Settings" from the dropdown menu.
4- Navigate to Google Authenticator Settings:
Scroll down to find the "Google Authenticator" settings.
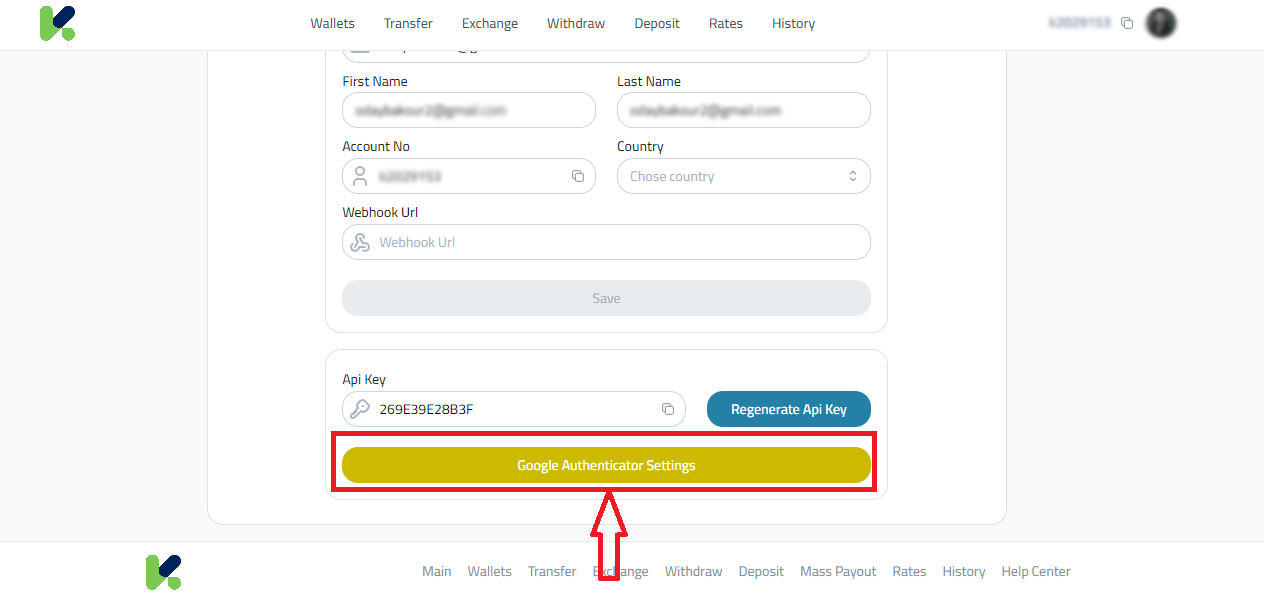
5- Enable Google Authenticator:
Toggle the setting to enable Google Authenticator.
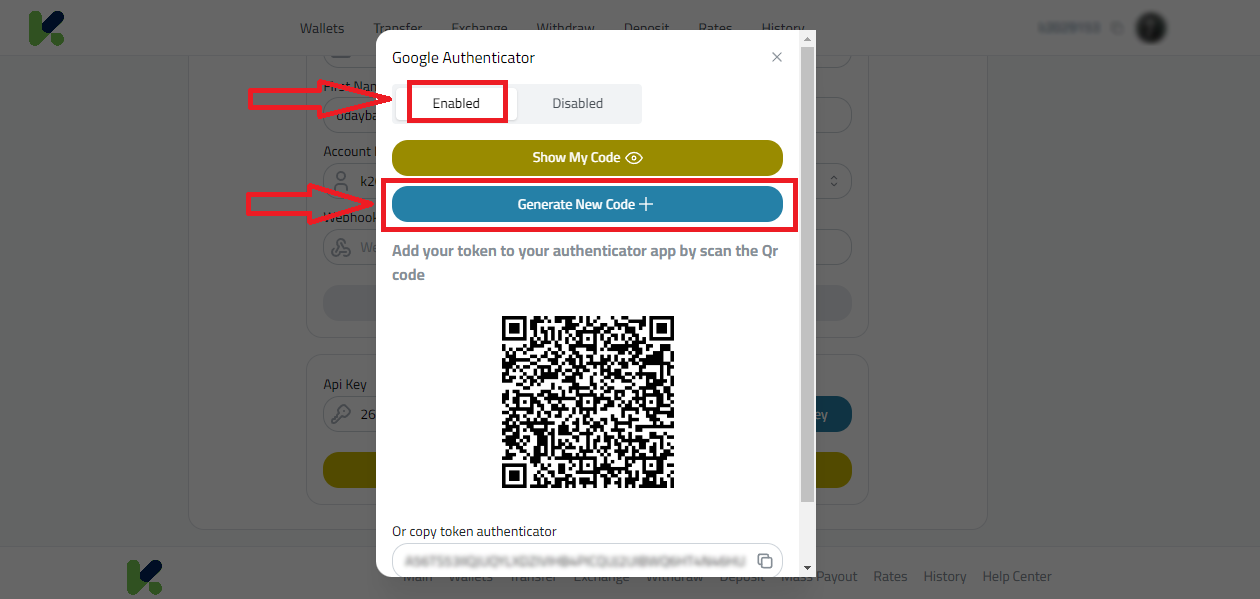
Click on "Enabled."
Click on "Generate New Code."
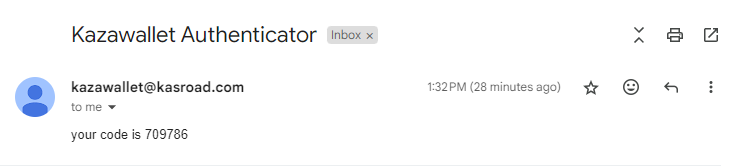
-6 Enter the code you have received
after you click on "Generate New Code." you will received a code on your email to but it on Kazawallet website.
-7 Choose Validation Method:
You can either scan the provided QR code using the Google Authenticator app on your phone.
Alternatively, you can copy the token and manually enter it into the Google Authenticator app.
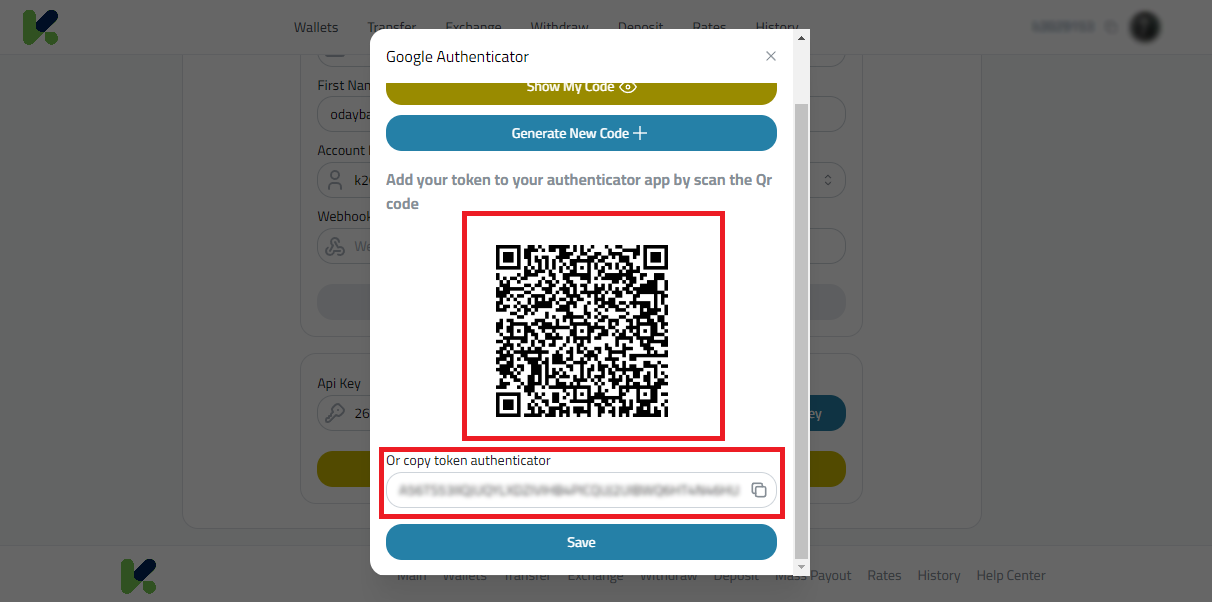
8- Save Your Settings:
After validation, click "Save" on your Kazawallet account.
Congratulations
Your Kazawallet account is now linked with Google Authenticator, providing an additional layer of security.
By following these simple steps, you've taken a proactive measure to enhance the security of your Kazawallet account.
If you encounter any issues or have further questions, feel free to reach out to our support team for assistance.